I constantly have virtual meetings. You probably do too.
I also use Loom as if it was a religion. (… seriously)
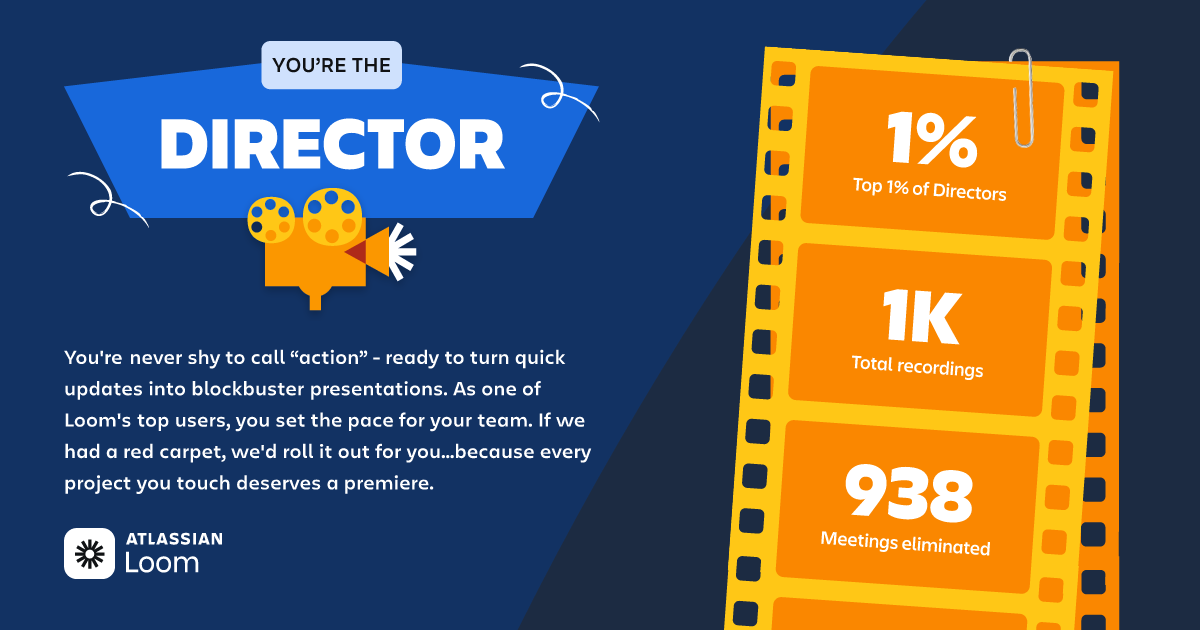
My 2025 Loom Stats
On top of meeting with stakeholders & sending too many loom videos, I also often use Focusmate to help make progress on the most important things.
The one common denominator in all of these functions is streaming audio + video from your laptop to the hosting service.
Zoom, Loom, Focusmate - they’re all taking audio + video from your device and chucking it across the internet.
Pair that with me - being an audiophile & obsessive with my productivity environment - I find it indulgent (& slightly vain) to have the best audio quality possible.
And people notice.
A lot.
They often ask:
“How do you get your audio to sound so good”?
“Are you a podcaster? Your mic sounds amazing!”
or my fav - “Can you tell me how I can get my microphone to sound like that?”?
Because of these types of questions, I created this resource to share my signal chain so I don’t have to go on a 2 minute monologue and bore them to death.
So, if you’re one of the people receiving this link in response to a similar comment - hopefully this is helpful!
Software + Signal Chain > Fancy Gear
Before I dive into fun gear talk, I need to walkthrough the signal chain and software setup I’ve got running.
This is where the magic happens.
Without proper signal chain, and audio processing, your audio can’t get as clear and “podcasty” as you’d like.
Sure, a nicer microphone can make a huge difference - but without the right software + signal chain - you’re going to sound just like everybody else who bought an external USB-C mic.
Signal Chain
Important Note: I run everything through macOS, so your software & tools may look different if you’re on Windows/Linux.
At a high level, here’s how my signal chain works.
I have two setups. One at my desk in my home office. Another one on the go.
At home, I have a Shure SM7B microphone connected to a Cloudlifter. Out of the Cloudlifter, I run into the input on my Behringer audio interface. This audio interface is connected to my macbook via USB-C.
On the go, I simply use a Shure MV6 USB-C microphone connected directly to my Macbook Pro.
After I get audio routed into my Macbook Pro, the signal chain is identical.
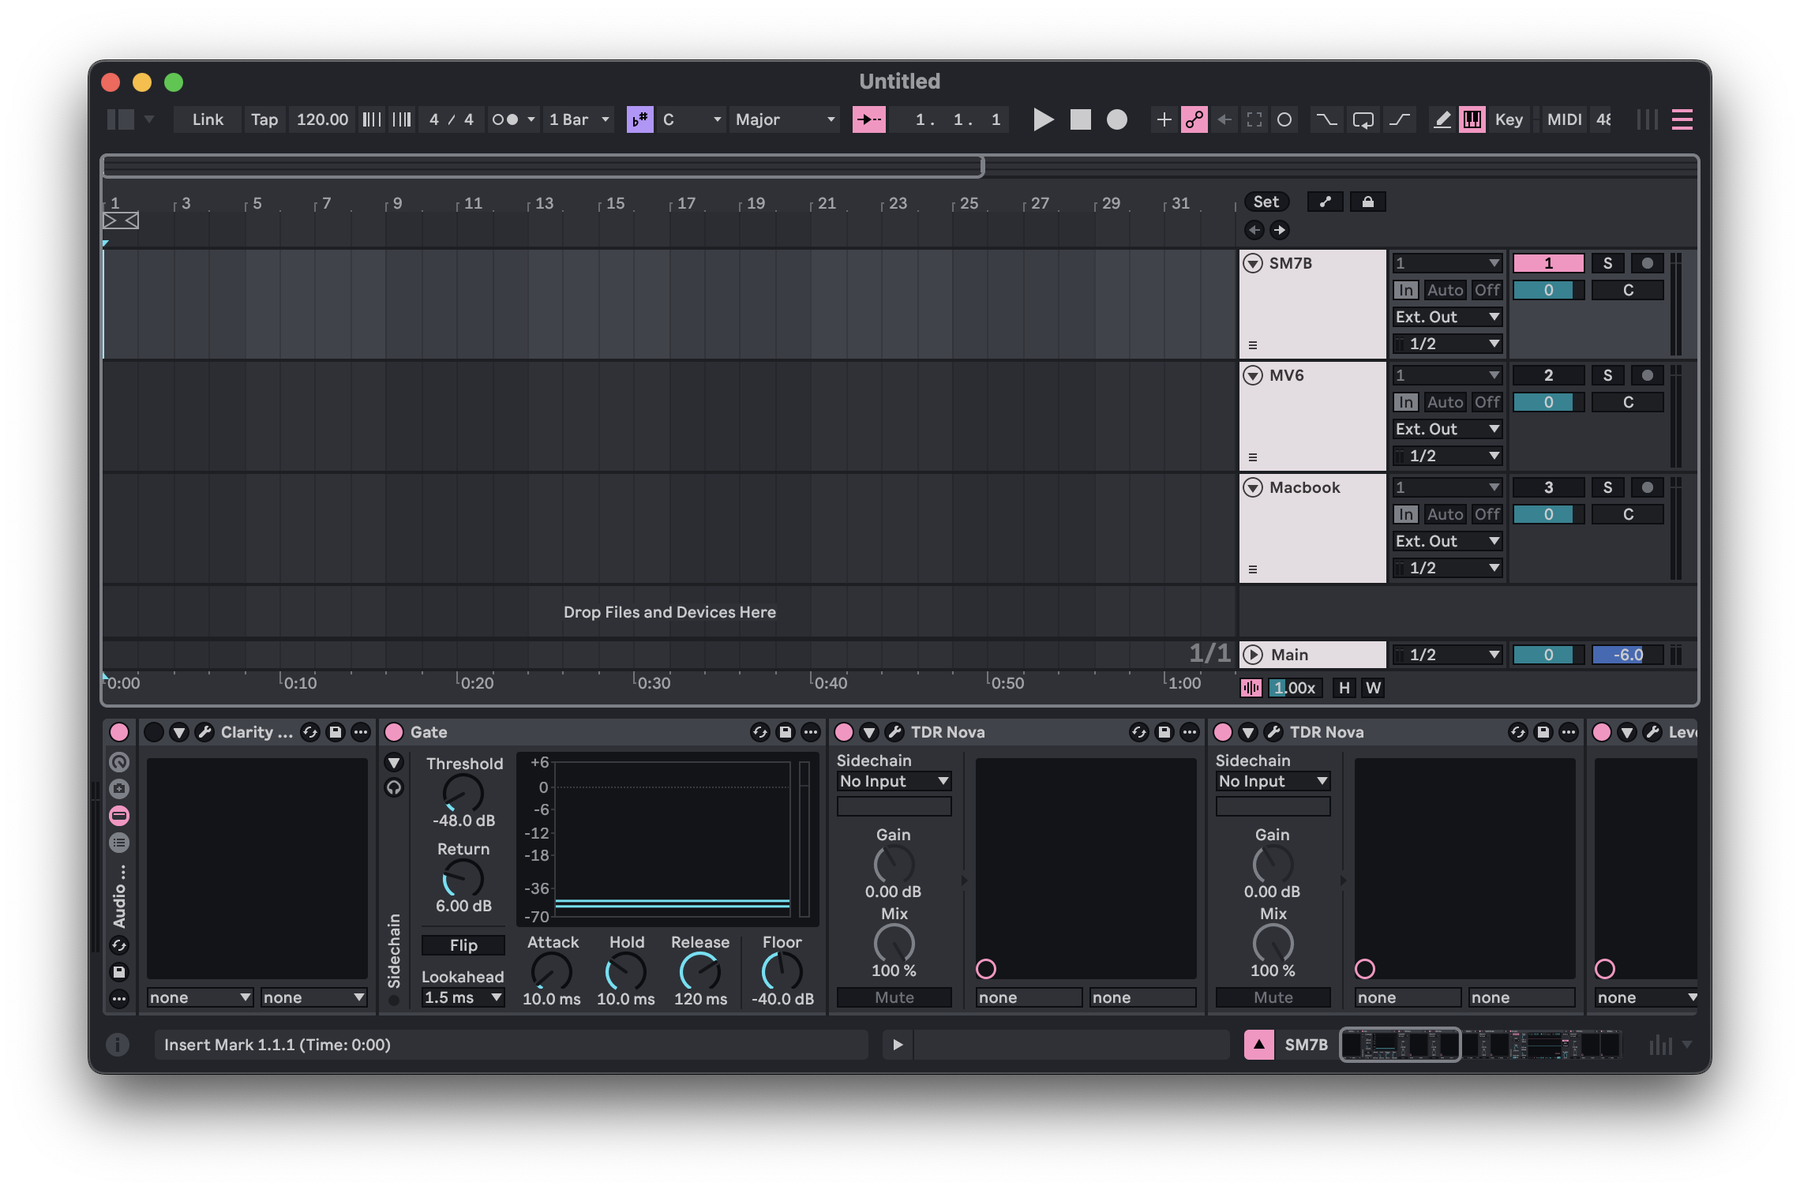
A screenshot of my Ableton Live “Mic Processing” file
I route my Microphone audio into Ableton Live (my DAW of choice) as the input.
I keep Ableton running in the background with channels that are live monitoring + processing my microphone audio.
I then route the output of Ableton to a virtual audio driver (I use Blackhole 2.ch for macOS) so that I can use this audio channel as the INPUT for Zoom/Focusmate/Loom/etc.
To over-simplfiy what this is doing:
-
I plug in my mic to my Macbook.
-
The microphone audio gets sent to Ableton Live.
-
Ableton processes the mic audio to sound better than out-of-the-box.
-
After processing, Ableton sends audio out to Blackhole.
-
I select Blackhole as my Mic in Zoom/Focusmate/Loom/etc.
Where the real magic happens
The true magic is in the Ableton processing.
Depending on which mic I am actively using, I can select from 2 channels labeled appropriately that process the mic’s audio input.
These channels have slightly different stacked plugins and signal chains.
Each mic channel has varying EQs, compressors, and a gate.
Why? Because the way the SM7B picks up audio has a slightly different frequency curve than the MV6 (& vice versa).
And my goal is clean audio; no matter what mic is being used.
With this setup, I keep only the current mic’s channel active in Ableton.
Now let’s talk gear
I already mentioned gear above in the high level look at the signal flow, but I want to explain why I have each piece of gear.
Shure SM7B
A legendary dynamic microphone that has taken the podcasting world by storm. Even it’s silhouette is iconic. It' truly sounds amazing and being a dynamic mic, it’s going to naturally be much more directional than say a condenser mic (this is something you want for less-than-ideal sound environments)
Cloudlifter
Shure SM7Bs are notoriously quiet microphones. So you’re going to want to “lift” the gain (think of gain as the “baseline” volume of the microphone) without adding any noise (crackling, distortion, unwanted audio artifacts). The Cloudlifter does this phenomenally well.
Audio Interface
Doesn’t really matter which one you use, the cheaper you go, the more noise you get - but you just need something to convert your XLR input from your mic/cloudlifter to USB for your computer to process it. Behringer makes affordable options, but Focusrite & Universal Audio are objectively better.
Shure MV6
A compact, lightweight, dynamic microphone that connects to your computer directly via USB-C (no Cloudlifter or Audio Interface required). I use this mic for on-the-go work. Once again, the fact that is dynamic means that I can use it (combined with proper audio processing) to significantly reduce any background noise heard in a coffee shop/hotel lobby/or airport terminal. Won’t ever sound as good as the SM7B, but it get's way closer than I would’ve ever imagined.
Microphone type matters
The biggest thing here I want to point out is the fact that I use dynamic microphones. This is super important for clean audio. You want to reduce as much sound and noise picked up by the microphone as possible before you process the audio.
Meaning, if you can use a mic that is more directional (where you point it is what it’s going to pick up most), you’re already cutting out a ton of room reflections, background noise, and unwanted sound from the original audio of the mic (pre-processing).
Don’t get me wrong, a nice condenser mic can sound amazing. Even better than a dynamic mic in some cases… But the room must be treated properly to reduce reflections + unwanted noise.
For a home office, this is definitely possible, but it’s pretty expensive.
For on-the-go this is truly impossible.
There is a reason singers and musicians use dynamic microphones for live shows on stages rather than condensers. You have way more control over what the mic picks up simply by pointing it in the right direction than with a condenser.
Making this work in real life
So that’s how I get clean audio.
I use dynamic microphones routed into Ableton Live for processing and routed out (virtually via Blackhole 2.ch) into Zoom/Focusmate/Loom/etc.
I didn’t deep dive my actual mic processing because everyone’s voice, room reflections, desired outcome, and use cases are all going to be different.
However, I will say I invested time to really dial in my processing.
I wanted to get my on-the-go mic sounding as close as possible to my home office mic.
And I think I did a pretty good job.
So here’s to overkill audio routing + processing for use cases that don’t need it.
Maybe just for the fact that it’s truly delightful to deliver a great audio experience for the other person on the line.
Maybe because there’s just a little bit of vanity & pride in my heart.
Either way, I think clean audio is a good thing and net positive for the human experience.
P.S. I also used BetterTouchTool to setup keyboard shortcuts + a simple CLI tool to easily switch between the Blackhole 2.ch input and my Macbook mic. This makes it super easy to undock and roll without having to swap inputs in Ableton.